Auto-formatting GitHub URLs with macOS Automator
Published on .
I like to format GitHub URLs into tidy Markdown when sharing them in chats or recording them in notes.
This means transforming a URL like this:
https://github.com/alexpearce/home/issues/75into a Markdown link like this:
(alexpearce/home#75)[https://github.com/alexpearce/home/issues/75)It takes a few seconds to do this by hand, but I do it several times per day and who knows how productive I’d be without this enormous time sink!
We’ll see how to write some JavaScript which will automate this process in macOS. It should also serve as a springboard for writing similar text manipulation automations.
If you already have a vague idea about what “services” and “Automator” are, you might want to skip straight to workflow creation. Otherwise, an overview!
Quick Actions
After using macOS for a while, you might notice a “Services” entry in some menus.
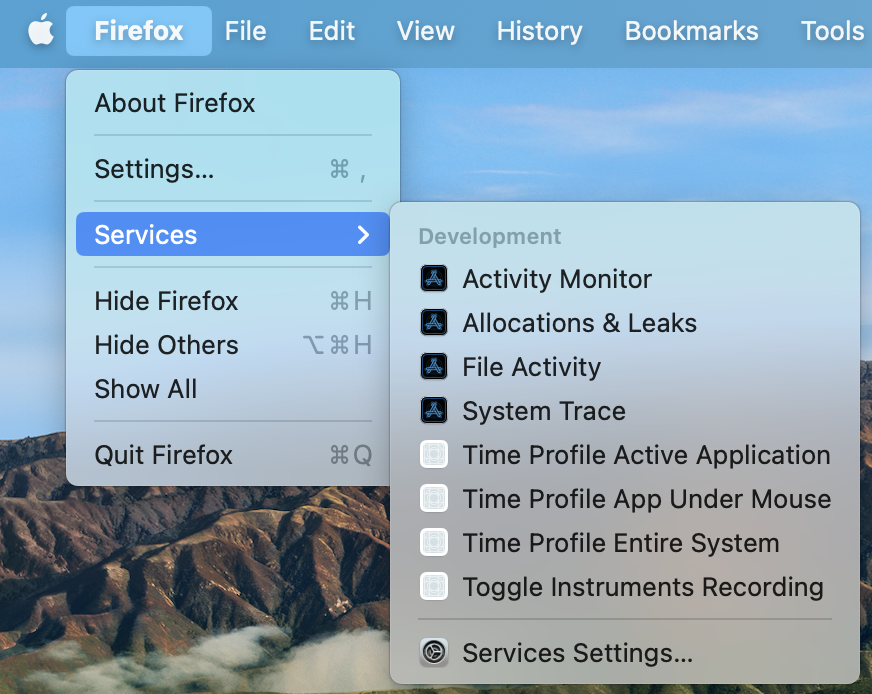
For example, there’s a Services entry in the menubar:

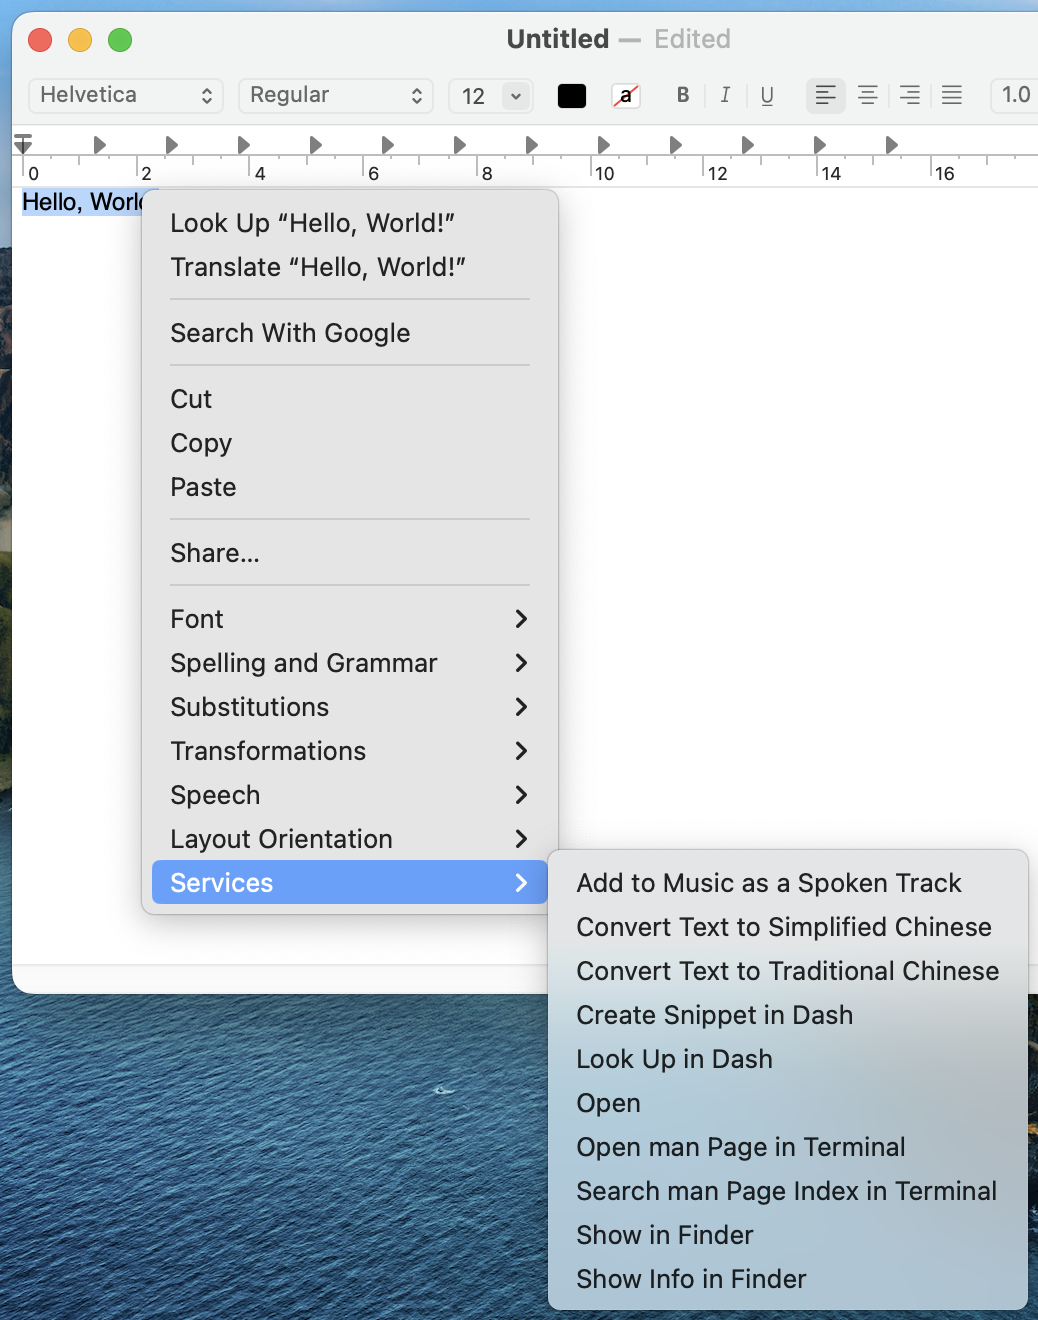
And there’s often a Services entry in the right-click menu when selecting text:

Services, also called Quick Actions, are helpful little programs you can run from these menus or by binding them to keyboard shortcuts.
The programs are typically written in the Automator app, which is similar in many ways to its younger, shinier brother Shortcuts.
macOS already provides several services you might find useful. But we want to do something different, so let’s make our own!
Automator
The Automator app lets us piece together many predefined bits of logic, called actions, into a single workflow. Provided actions include:
- Getting the contents of the clipboard.
- Displaying a notification or input window.
- Cropping images.
- Running scripts.
Programmers are pretty used to automating repetitive tasks in their codebases by refactoring or writing helper scripts, but it’s easy to overlook the possibility of doing the same for tasks normally done with a keyboard and mouse.
We’ll use Automator to write a Quick Action which will:
- Get the contents of the clipboard.
- Run some JavaScript which accepts the clipboard contents and returns the tidy Markdown.
- Insert the tidy Markdown into whatever application we’re currently in.
We’ll then configure macOS to run this Quick Action when we use a keyboard shortcut.
Writing the workflow
Open Automator and create a new, empty Quick Action.
In the sidebar, use the search bar to find the “Get Contents of Clipboard” action and drag it into the workflow pane on the left.
Find the “Run JavaScript” action in the sidebar and drag it below the clipboard action in the workflow pane.
The JavaScript action will be populated with a skeleton script:
function run(input, parameters) {

  // Your script goes here

  return input;
}
I’ve struggled to find much documentation on exactly what shape one can expect input and parameters to be, or on the JavaScript runtime environment.
But for our purposes it’s enough to know that input is array-like and we have language support from at least ECMAScript 6.
As we expect a single input value (the clipboard contents) we can destructure the input argument to capture that value.
function run([url], parameters) {
  // …
}
There are many ways to write the body. I chose to use a regular expression with capture groups to match the username, repository, and pull request/issue ID components in the input URL. If the regular expression does match, we format and return the tidy Markdown string. Otherwise, we return the original input.
This gives us the full script:
function run([url], parameters) {
  const pattern = /https:\/\/github\.com\/(?<username>[A-Za-z0-9-]+)\/(?<repository>[A-Za-z0-9-_\.]+)\/(?:pull|issues)\/(?<id>(\d+))/;
  const match = url.match(pattern);
  if (match === null) {
    return url;
  } else {
    const {username, repository, id} = match.groups;
    return `[${username}/${repository}#${id}](${url})`;
  }
}
Finally, we just need to modify the workflow parameters at the top of the workflow pane.
- Mark the workflow as receiving “no input”. The workflow retrieves its input from the clipboard explicitly.
- Check the “Output replaces selected text” box. This causes the return value of the script to be inserted at the current cursor position (overwriting any selected text).
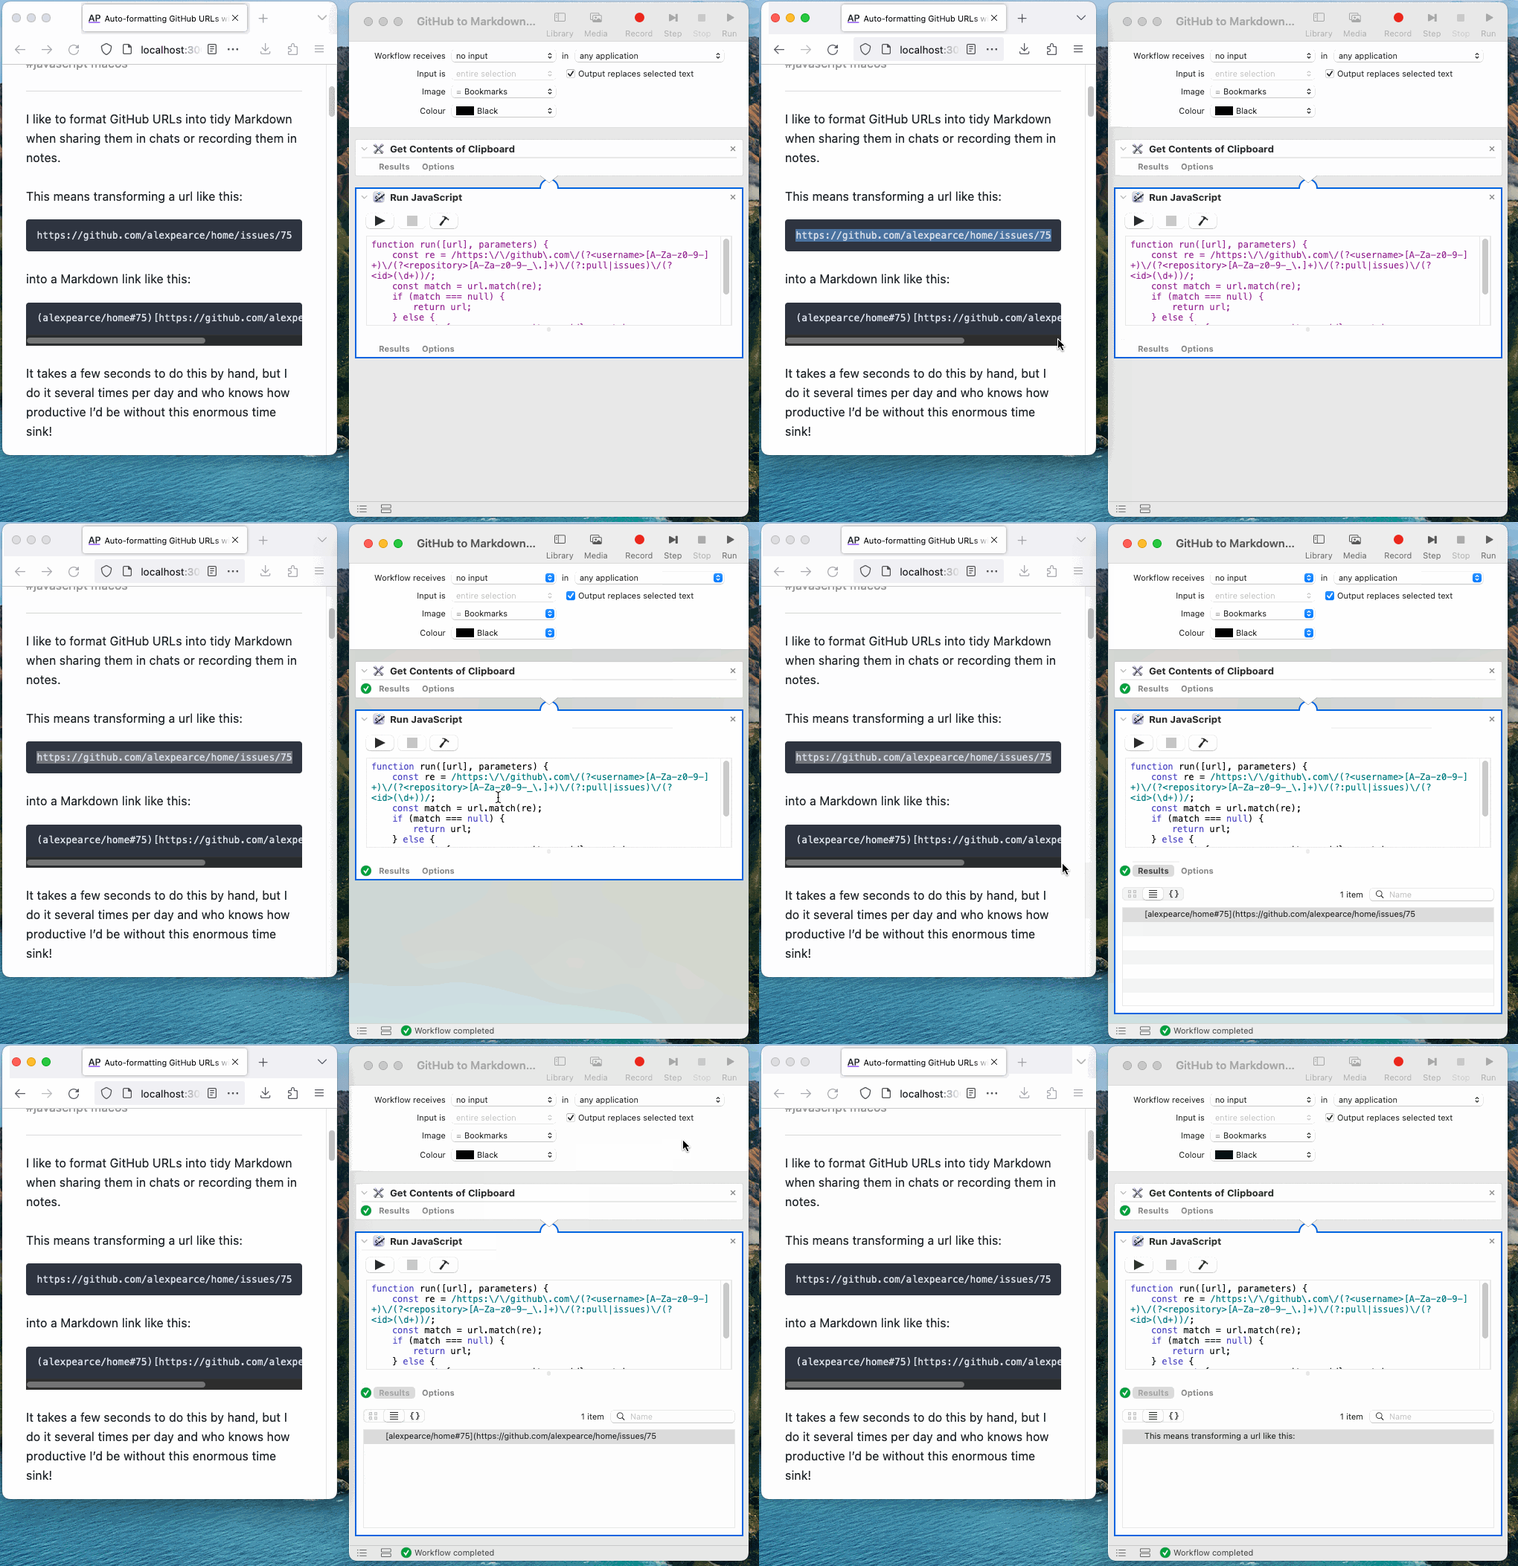
You can test the script with the “Run” button in the top-right. Clicking the Results button just underneath the script editor reveals the output of each run.
When you have a GitHub URL in your clipboard, you should see the Markdown in the results table after a run. Otherwise, you should see the original clipboard contents.
Here it is in action:

Save the workflow. I called it “GitHub to Markdown”.
Keyboard shortcuts
We’ll assign a keyboard shortcut to our action so that we can run it wherever we are.
In System Settings, open the Keyboard item and click Keyboard Shortcuts. Select Services in the sidebar and then find the workflow we just created under the name you chose. I’m not sure how macOS decides what category to place custom workflows under; sometimes mine end up in “Text”, other times in “Internet”.
Double click the “none” field next to the workflow and press the keys you’d like to use. This usually means pressing and holding the modifier keys you’d like and then finally pressing a letter, symbol, number, or function key.
I chose ctrl + opt + cmd + I (⌃⌥⌘I) as the shortcut.
Here’s the final keyboard-activated service in action, with my keystrokes shown in the bottom-right corner:

Learning this trick opens up a lot of possibilities! You could for example support more repository hosters than just GitHub, expand the shorthand issue/PR notation to a full link, or auto-wrap selected text with a URL in your clipboard.
If you have handy automations you can’t live without, please share them in the comments!
back to top ↑