Flask with Apache and Shibboleth authentication
Published on .
This post has been archived. It's pretty old and likely concerns topics that are avoidable by using more modern tools and techniques. The original text is preserved below for posterity but it may no longer be relevant or correct.
The IT infrastructure at CERN is well managed and reasonably well documented, but sometimes in can still take a day or two to figure out how to get something up and running there. I needed to deploy a Flask application that only allowed access to registered CERN users, which meant talking to the single sign-on (SSO) service to authenticate users. After initially thinking this would be a simple task, I spent the standard two days cursing and scratching my head.
This post serves as a brain dump for what I found out, what problems and solutions I came across, and how to — eventually — get the thing working. At the end of this tutorial, we’ll end up with Flask application that allows users to log in using their CERN credentials.
CERN specifics
This is a tutorial for setting up the system inside a CERN cloud virtual machine, and uses CERN’s internal authentication mechanisms. This means you will need a CERN computing account to follow along exactly. However, many of the steps here and the problems I found will be common to other setups with a Python web application, a WSGI server, Apache, and Shibboleth.
Super user requirements
Most of the work is done on the command line, and some of the commands require super user/root privileges, which can be gained by prefixing commands with sudo when run by the user who made the VM.
If an entire block of commands requires such privileges, I will say so in the preceeding paragraph.
If only some commands in a block require it, I’ll add a comment just above the relevant command that applies only to the command below the comment.
So, watch out!
Creating a CERN virtual machine
We first need a machine to run the web server on. Nicely, CERN has a great virtual machine (VM) service based on OpenStack that allows users to manage their own set of VMs.
To use this, follow the short “Getting Started” guide to get a CERN OpenStack account. The most important point for us is on the next page, “Before you start”, which points you to the CERN resources page so that you can activate the OpenStack service on your account.
Within around half an hour, you should be able to log in to the CERN OpenStack portal.
Once you’re in, create a new instance using the m1.small flavour and choose to boot from the SLC6 CERN Server - x86_64 [2014-08-05] image, or a similarly recent SLC6 CERN Server image if that exact one isn’t available.
The “instance name” you give the VM will correspond to the URL used to access it.
I’ll assume the VM is called ssotutorial, which means you can access the machine at ssotutorial.cern.ch but only inside the CERN network.
General external access isn’t allowed to cloud VMs for security reasons.
(You will need to call the VM something else, as names must be unique across the CERN network, so replace ssotutorial with the name you’re using.)
Once the virtual machine is provisioned and running, which can take a little while, you should be able to log in with the account you used to create it.
$ ssh myaccount@ssotutorial.cern.chThis will probably ask you for a password, which is your regular CERN password.
Setting up the VM
From now on, all commands should be run on the virtual machine, with the above caveat about root privileges.
Update any old packages and reboot the VM, both as root, to ensure any updated kernel becomes the running one.
$ yum -y update
$ reboot
Log back in to the VM once it has rebooted.
As the root user, add a deploy user to handle running the application.
$ adduser deploy
$ passwd deploy
# Set the password to `deploy`
# Then to assume to deploy user, do
$ su - deploy
# Enter the deploy user's password
Unless it is stated to run commands with super user privileges, all the following commands will be run as the deploy user.
Apache
Although I would rather deploy a Flask application with nginx, as I’m more familiar with it and prefer its configuration, Shibboleth support for nginx is not great, and trying it looks like it would be more painful than just going with Apache. The CERN documentation on SSL and SSO also deals only with Apache.
So, let’s install Apache and configure it to start automatically on boot. As root:
$ yum install -y httpd
$ chkconfig --levels 345 httpd on
$ service httpd start
As Shibboleth must run over HTTPS which by default is on port 443, we must open that port in the firewall, which by default is pretty locked down. We will also open port 80 so that we can redirect visitors trying to visit over unencrypted HTTP. Again as root:
$ iptables -I INPUT 5 -i eth0 -p tcp --dport 80 -m state --state NEW,ESTABLISHED -j ACCEPT
$ iptables -I INPUT 5 -i eth0 -p tcp --dport 443 -m state --state NEW,ESTABLISHED -j ACCEPT
# Persist the rules on reboot
$ service iptables save
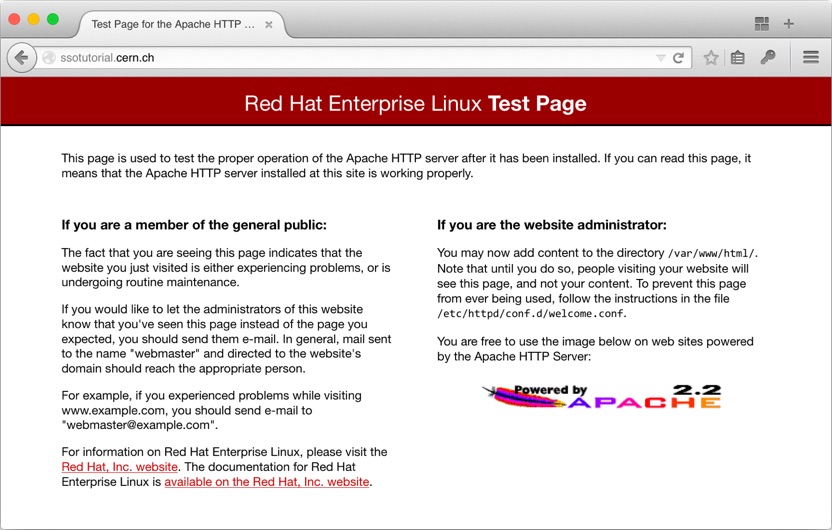
Visiting ssotutorial on port 80 should show the Apache test page.
SSL
To encrypt traffic between Apache and clients, we need an SSL certificate for the server. The CERN Grid Certification Authority issues host certificates to CERN users, so visit them and follow “New host certificate (requires certificate authentication)”. To get the certificate, we must generate a certificate signing request on the VM.
# Make sure to replace ssotutorial with the name of *your* VM!
$ openssl req -new -subj "/CN=ssotutorial.cern.ch" -out newcsr.csr -nodes -sha512 -newkey rsa:2048
This will create two files, newcsr.csr and privkey.pem.
The former is the certificate signing request, which you need to copy the contents of in to the field on the host certificate request form, and the latter is the private key.
The private key should be kept secret, as it is the proof that the server is who it says it is.
After pasting in the certificate signing request and submitting the form, download the Base64-encoded host certificate and certification authority (CA) certificate chain to the VM.
(You can download the certificates to your local machine and then upload them to the VM with scp host.cert host-chain.p7b ssotutorial.cern.ch:.)
Convert the CA certificate chain to the .pem format so Apache can read it.
$ openssl pkcs7 -inform PEM -outform PEM -in host-chain.p7b -print_certs > CERN-bundle.pemThen move the host certificate, the CA certificate chain, and the private key we generated in to place as root.
$ cp host.cert CERN-bundle.pem /etc/pki/tls/certs
$ cp privkey.pem /etc/pki/tls/private
$ chmod 600 /etc/pki/tls/{certs/host.cert,private/privkey.pem}
Install the SSL Apache module mod_ssl as root.
$ yum install -y mod_sslEdit the Apache SSL configuration in /etc/httpd/conf.d/ssl.conf as root to point to the correct certificates, making sure the following lines are present and that the directives only appear once in the file.
(You can use, for example, sudo vi /etc/httpd/conf.d/ssl.conf to edit a file with super user privileges.)
SSLCertificateFile /etc/pki/tls/certs/host.cert
SSLCertificateKeyFile /etc/pki/tls/private/privkey.pem
SSLCertificateChainFile /etc/pki/tls/certs/CERN-bundle.pem
On CERN advice add the following line after the LoadModule ssl_module modules/mod_ssl.so line in the same ssl.conf file.
TraceEnable OffRestart Apache as root.
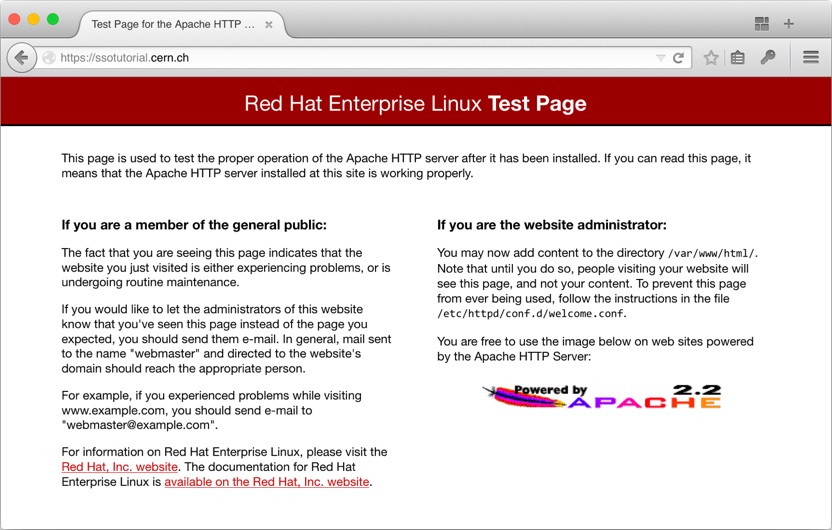
$ service httpd restartVisiting the secure ssotutorial on port 443 should show the Apache test page.
Unless you have the CERN Grid Authority CA certificate installed in your browser, you will get a warning about the site’s certificate being invalid due to the CA not being recognised.
With SSL set up and working, Shibboleth, part of CERN’s single sign-on stack, will allow itself to run. However, in order for the Shibboleth daemon in the server — which we’ll install shortly — to be able to talk to CERN’s user database, we need to add our application to the approved list, which requires the authorisation of CERN IT.
The SSO management page allows you to register a new SSO application, so go there and fill in the form with the application name like “SSOTutorial”, the application URI and homepage like https://ssotutorial.cern.ch, and the application description however you like.
It took about 30 minutes for my application to be approved, but it could take longer outside working hours. In the mean time, we’ll set up our Flask application.
Flask and uWSGI
Flask is a web application framework written in Python. It comes with a development server, but for production we need something more robust that can handle things like concurrent connections and multiple worker instances. I chose to use uWSGI as it has a nice Apache module — that we’ll get to soon — and a nice configuration.
First, we’ll set up the environment the application will run in. In order not to pollute the global Python configuration as much as possible, we’ll install the application’s dependencies inside a virtualenv, which we’ll manage with virtualenvwrapper. This means installing pip, a Python package manager, which makes installing modules super simple.
# Set up the bash environment for virtualenvwrapper
$ export WORKON_HOME=$HOME/virtualenvs
$ echo 'export PATH=$HOME/.local/bin:$PATH' >> $HOME/.bashrc
$ echo "export WORKON_HOME=$WORKON_HOME" >> $HOME/.bashrc
$ echo 'source $HOME/.local/bin/virtualenvwrapper.sh' >> $HOME/.bashrc
$ mkdir -p $WORKON_HOME
# Then install pip
$ curl https://bootstrap.pypa.io/get-pip.py -o $HOME/get-pip.py
$ python $HOME/get-pip.py --user
# And then install virtualenv stuff
$ pip install --user virtualenv virtualenvwrapper
$ rm -f $HOME/get-pip.py
$ source $HOME/.bash_profile
Before we install Flask, the Python development package and a compiler must be installed in order to compile Flask’s C extensions.
# As root
$ yum install -y python-devel gcc
Finally, make and set up the virtual environment for the application and create the file structure.
$ mkvirtualenv ssotutorial
$ pip install flask
$ mkdir -p ssotutorial/ssotutorial
$ cd ssotutorial
$ touch ssotutorial/__init__.py
Whenever we work with the application, like running it, it must be done inside the ssotutorial virtualenv.
If you need to ‘reactivate’ it, do workon ssotutorial.
Fill in __init__.py with an example Flask application that displays the time on the root URL /.
from datetime import datetime

from flask import Flask


def time_string():
    t = datetime.now().time()
    return '{0:02d}:{1:02d}:{2:02d}'.format(t.hour, t.minute, t.second)


def create_app():
    app = Flask('SSOTutorial')

    @app.route('/')
    def index():
        t = time_string()
        return '<h1>Hello, World!</h1><h2>Server time: {0}</h2>'.format(t)

    return app


def wsgi(*args, **kwargs):
    return create_app()(*args, **kwargs)


if __name__ == '__main__':
    create_app().run()
The wsgi method is the one that the WSGI server will call, but you can test the application now using the Flask test server by running python ssotutorial/__init__.py.
(You won’t be able to see the test server, which by default binds to 127.0.0.1:5000, in the browser as port 5000 is blocked by the VM’s firewall, but you can do curl 127.0.0.1:5000 in another session on the VM to see the page load successfully.)
To run the application behind a WSGI server, we’ll install uWSGI and also install Honcho to manage the processes.
$ pip install uwsgi honchoCreate a Procfile in the root ssotutorial directory and fill it with the uWSGI startup command.
web: uwsgi -s 127.0.0.1:8000 -w ssotutorial:wsgi --buffer-size=32000The --buffer-size option sets the uWSGI buffer to 32 kB.
The default size is quite small, as hinted at in the uWSGI things to know guide, and gets easily overloaded by the large headers used during the SSO procedure, which is explained in more detail later.
To run the uWSGI server, inside the ssotutorial virtual environment and inside the root ssotutorial folder run honcho start.
At this point you might notice things getting cumbersome with one SSH session to the VM.
When testing I found it useful to have (at least) two sessions open: one exclusively dealt with the application, like running honcho start, and the other was for editing other configuration files, restarting Apache, and so on, with super user privileges.
Apache and uWSGI
We’re at the stage where we can combine our previous efforts by getting Apache serving pages via uWSGI.
This requires us to install the mod_proxy_uwsgi Apache module mentioned earlier.
We first need to install the Apache development files, then download the uWSGI source code, and finally build and install the module.
# As root
$ yum install -y httpd-devel git
$ git clone https://github.com/unbit/uwsgi.git
$ cd uwsgi/apache2
# When we did `pip install uwsgi` it installed particular version
# which you can see by doing `pip freeze` in the virtualenv
# Checkout that same version here
$ git checkout 2.0.8
# As root
$ apxs -i -c mod_proxy_uwsgi.c
$ cd ../../
$ rm -rf uwsgi
Have Apache load the new module by editing the main Apache configuration file /etc/httpd/conf/httpd.conf to add the line
LoadModule proxy_uwsgi_module modules/mod_proxy_uwsgi.soTo test everything’s wired up correctly, we can temporarily add the proxy information to the bottom of the VirtualHost block in /etc/httpd/conf.d/ssl.conf, which needs to be edited as root.
ProxyPass / uwsgi://127.0.0.1:8000/This will send all traffic matching / and its descendants to uWSGI. We’ll create a configuration file specifically for the application in the conf.d folder later.
Finally, the SELinux permissions need to be relaxed to allow Apache to connect to the proxy.
# As root
$ setsebool httpd_can_network_connect 1
For all these changes to take effect, restart Apache.
# As root
$ service httpd restart
Visiting the secure ssotutorial on port 443 should now show the Flask page showing the time.
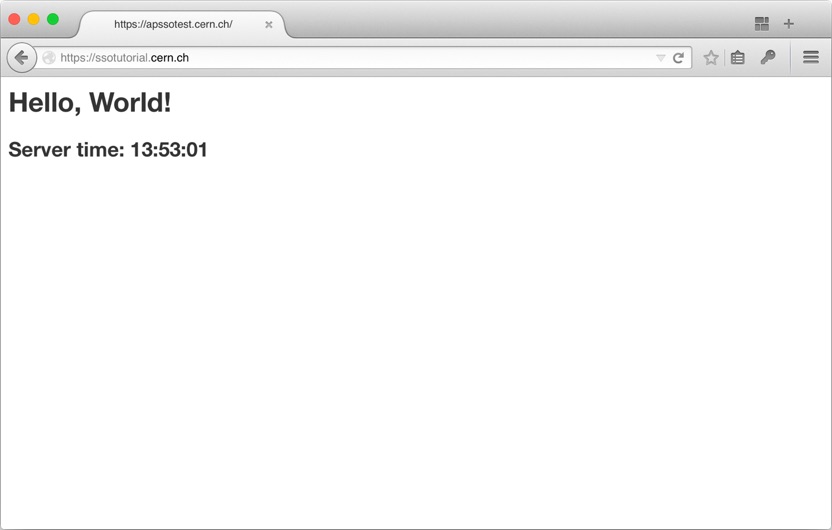
Fantastic! We’ve now got four major pieces in place: Apache, SSL, uWSGI, and Flask. The only thing left to do now is setting up Shibboleth so that we can authenticate our users.
Shibboleth
By now the SSO application should have been approved, so we can proceed with installing and configuring Shibboleth. As root, install Shibboleth and its dependencies.
$ yum install -y shibboleth log4shib xmltooling-schemas opensaml-schemasEdit the SELinux configuration from enforcing to permissive, as instructed by CERN, and manually apply the change now to avoid the need to reboot.
As root:
$ vi /etc/sysconfig/selinux # Change 'enforcing' to 'permissive'
$ setenforce Permissive
Next, download the CERN-specific Shibboleth configuration files.
$ curl -O http://linux.web.cern.ch/linux/scientific6/docs/shibboleth/shibboleth2.xml
$ curl -O http://linux.web.cern.ch/linux/scientific6/docs/shibboleth/ADFS-metadata.xml
$ curl -O http://linux.web.cern.ch/linux/scientific6/docs/shibboleth/attribute-map.xml
$ curl -O http://linux.web.cern.ch/linux/scientific6/docs/shibboleth/wsignout.gif
Then, enable the Shibboleth service to run on startup and move the files we just downloaded in to place as root.
$ chkconfig --levels 345 shibd on
$ service shibd start
$ cp shibboleth2.xml ADFS-metadata.xml attribute-map.xml wsignout.gif /etc/shibboleth
Edit /etc/shibboleth/shibboleth2.xml and replace all instances of somehost.cern.ch with the hostname of the VM — ssotutorial.cern.ch — and make sure this exact line is present.
<TCPListener address="127.0.0.1" port="1600" acl="127.0.0.1"/>Restart Apache and the Shibboleth daemon as root for the changes to take effect.
$ service shibd restart
$ service httpd restart
Shibboleth installs an Apache configuration file at /etc/httpd/conf.d/shib.conf, which sets up the URL /secure to require a valid Shibboleth session.
If you try to visit this now, however, you’ll get a 404 error.
This is because the ProxyPass rule we set up earlier, to proxy all traffic to the uWSGI, is overriding the Shibboleth rule, and our Flask application doesn’t have a route set up for /secure.
To test that Shibboleth is working, you can comment out the ProxyPass line in ssl.conf and restart the httpd service.
Now when you visit the /secure path, you should be redirected to the CERN single sign-on page.
If you login successfully, you’ll be redirected back to the /secure path, which will give you a 404 error because there’s no document there for Apache to serve.
OK, so all the pieces work, now it’s time (finally!) to make them work together.
Integration
We want to allow users to log in with their CERN credentials to our Flask application via SSO. Once they’ve logged in, they should see the homepage displayed some information that’s been passed to the application by Shibboleth.
The first step is creating an Apache configuration file for our application in /etc/httpd/conf.d.
I’ve put together an example configuration in a gist.
I won’t go through what each Apache directive we’re using does, but I’ve not used anything that wasn’t already in the ssl.conf and shib.conf files provided when we installed mod_ssl and Shibboleth, respectively, so check them out for further details.
We can download the configuration file directly to the VM.
$ curl https://gist.githubusercontent.com/alexpearce/d6867026bf7cd1ac0cb6/raw/35563ca70baff6e88bc0c27c7ea284732c7189f6/ssotutorial.apacheconf -o ssotutorial.conf
# As root
$ mv ssotutorial.conf /etc/httpd/conf.d/
$ sudo chown root:root /etc/httpd/conf.d/ssotutorial.conf
Read the file to get an idea of what’s going on.
You will need to edit the file to change the name of the host from ssotutorial.
Because the settings in ssl.conf and shib.conf are defaults provided for us to base our own work off of, and we’ve now done that, we should stop them from being picked up by Apache.
There’s also a welcome.conf file which is provided when Apache is installed.
As root, add a .disabled extension to each file.
$ mv /etc/httpd/conf.d/ssl.conf{,.disabled}
$ mv /etc/httpd/conf.d/shib.conf{,.disabled}
$ mv /etc/httpd/conf.d/welcome.conf{,.disabled}
Restart Apache as root to reload the new set of configuration files.
$ service httpd restartThe final step is changing our Flask app. All it does now it display the time, so we need to add some login buttons and display the information we get from the sign-in procedure. To make this change simpler, now is a good time to understand the authentication flow.
Authentication flow
When Shibboleth is asked to provide authentication at a particular URL, /login in our case, it checks to see if the user is already authenticated by inspecting a cookie.
If the cookie is not present or is invalid, by containing invalid information or by having expired, the user is redirected to the configured SSO URL (CERN’s SSO login page, in this case).
If the user can’t successfully authenticate, they won’t get past the SSO login page and will only be able to browse URLs not protected by Shibboleth.
If the user provides valid credentials, they are first redirected to the /Shibboleth.sso/ADFS URL.
This is a special route, as the Shibboleth daemon watches it for incoming requests.
An incoming request from the SSO login page consists of a POST’ed XML payload which is parsed by Shibboleth.
The client is then redirected again, this time back to the URL they initially tried to access, along with some headers containing user information provided by the SSO service like their name, username, email, and so on.
(These headers can contain quite a lot of information, which is why we had to increase uWSGI’s buffer size earlier.)
Within our Flask application, we can watch this login URL for incoming requests and extract user information from the headers.
Remember, Flask won’t see a request at /login unless the user is authenticated, because Shibboleth will redirect them to the SSO login page if they are not.
We can store user information within the Flask session object.
If this information isn’t present in the session, we can redirect users to /login, initiating the login request, and store it when the user is eventually returned to /login.
Flask SSO
Our updated Flask application, available as a gist, now allows the user to log in and log out, storing and destroying their user information as they do so. It uses the Flask-SSO Flask extension to simplify the mapping of the headers from the authentication procedure to the user session object. Let’s install the Flask-SSO module, and overwrite the old application with our updated version.
# Stop the uWSGI server if you have it running,
# and reactivate the ssotutorial virtualenv before running pip
$ pip install flask-sso
$ curl -O https://gist.githubusercontent.com/alexpearce/4ef660422085838ff2d2/raw/951685c44142b84bd2f59b25bcb1e33f827be9e8/__init__.py
# Move the new __init__.py to the same location as the old one
$ mv __init__.py ssotutorial/ssotutorial/__init__.py
Now inside the root ssotutorial directory with the ssotutorial virtualenv activated, start the uWSGI server again.
$ honcho startWhen we visit our application, not much has changed…
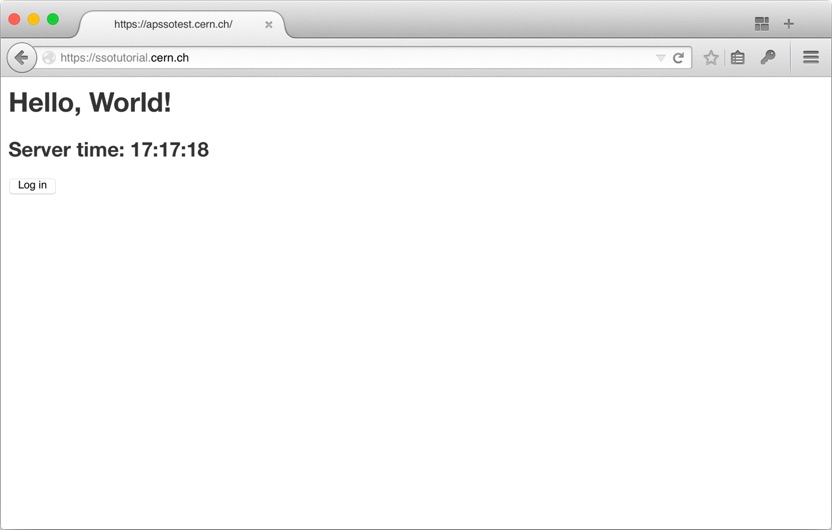
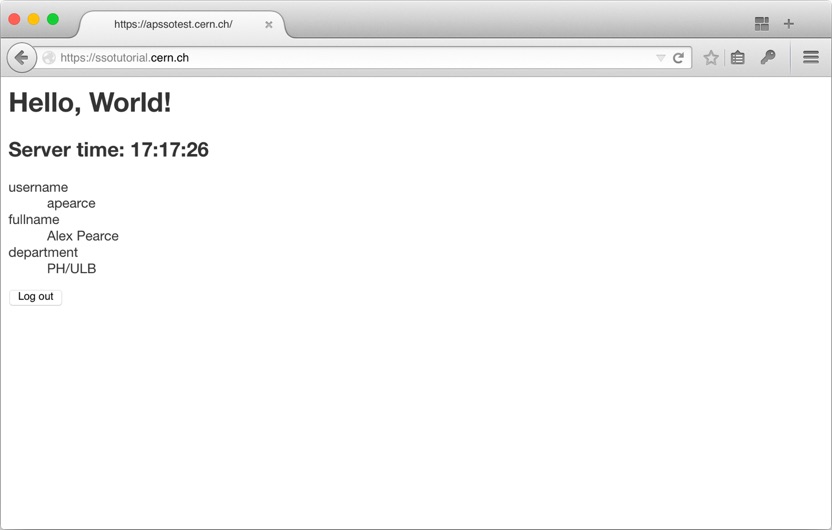
… but when we click the log in button, we’re redirected to the CERN SSO page, which redirects us back to the Flask app which displays our details. Cool!
Wrap up
So there we are. It’s been a long road, but a pretty neat result at the end! Once all the bits are set up, it’s just knowing how they fit together and what parameters to tweak.
Taking things from here is reasonably straightforward.
If you want to protect the whole site, change the protected location from /login to /.
If you want to inspect what parameters are returned in the XML to the ADFS endpoint, you can take a look at the attribute map XML at /etc/shibboleth/attribute-map.xml.
Feel free to ask any questions in the comments!
back to top ↑